

BOB
1. Start with a pre-fabricated skeleton. We bought from www.skeleton-factory.com which buys 4th quality anatomical scale models and sells them to Halloween nuts. We used a 3/4 size to save on weight as these guys are HEAVY.
2. You should be familiar with foam-o-fill, aka Great Stuff or expanding spray foam. We used this to replicate the general appearance of intestines and guts. Works wonderfully.
Apply the foam to Bob while he is lying face up on a protected surface. The foam sticks to everything, including your skin, permanently.
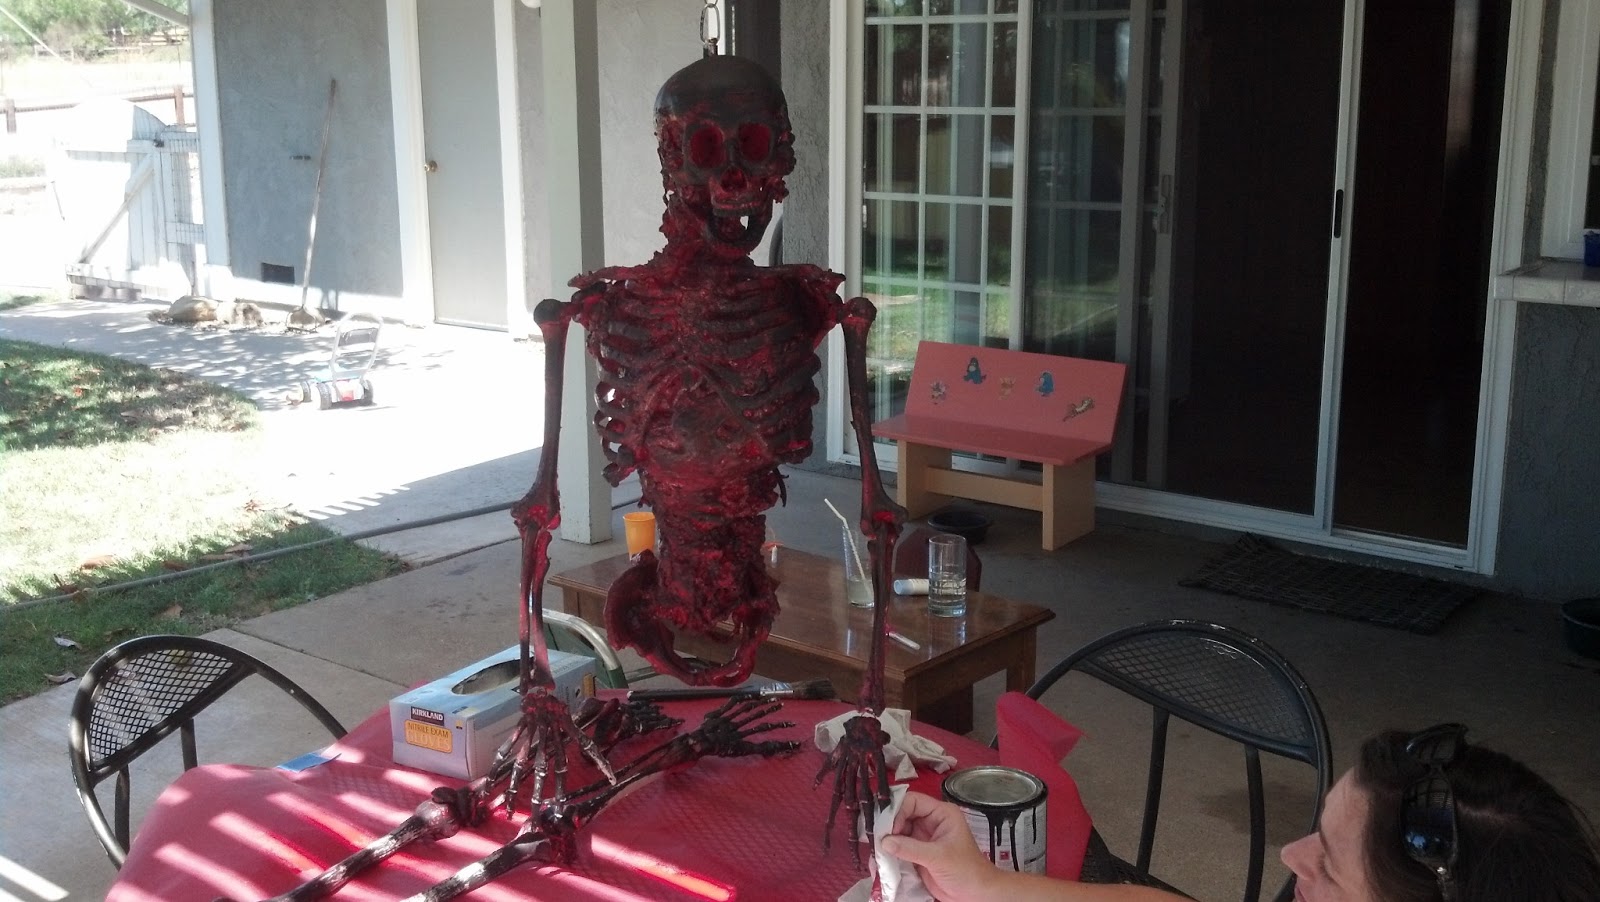 3. We used red paint as a base coat and then dry brushed black over it give Bob that raw meat on the inside, toasted on the outside look.
 4. You'll need some plastic sheeting (available at any home improvement store) and make sure you do this OUTSIDE because it is toxic. This is wrapped around Bob and melted with a heat gun to give the appearance of burnt skin. You can even twist and layer so it looks like tendons and muscle.
  5. The final stage involves using a really dark stain like walnut and staining the plastic. It will dry, just give it time. Dry brushing with black paint also works well.
 6. We attached Bob to a spit and with a rotisserie motor got him to rotate. His hands flop back and forth as he rotates! Awesome!
7. Finally, we put a light box under Bob so it looks like smoldering fire under him in the dark. Instructions on how to make a fire box in a later blog post.
We hope you like him! If you have any questions, just let us know.
Happy Haunting!

No comments:
Post a Comment