Thursday, August 22, 2013

WIN THIS TOMBSTONE!

Go to our Facebook page - Like and Share our Diliges post by September 1st and be entered to win our Diliges (Latin for Love) Tombstone!  

We'll announce the winner on Facebook and September 2nd!  Good Luck!


When Did Your Halloween Obsession Start?

Clearly, mine started much earlier than I even knew.  

My Mom dug this gem out of my grandmother's possessions while cleaning out her house.  

That's me, right there! 

Calisse, the second place winner in the 7 to 9 year old category at the Buellton store.  I remember winning this and being surprised.  I don't remember where I put that watch, though! Too bad, I sure would like to have it now.  :)

Tell us, when did you know you had a Halloween problem?  

Tuesday, August 6, 2013

DIY: Witch

One of our static props is our witch in her lair.  She has all manner of thing surrounding her from specimen jars, books on anatomy, mortar and pistol , crows, candelabras with skulls and lots of candles!  This year, we're going to add an autonomous rocking cradle - no baby, but lots of lace (hee, hee).  When we built her, we never thought we'd be blogging about our projects so we don't have many in-progress pics!  But, if anyone has questions about how we made her, let us know and we're happy to answer them all. 

Stage one - buy another skeleton, 3/4 size again to save weight.  These come with a hook in their skull which makes for easy hanging.  Our witch is suspended using wire that threads through her hair and hat.

Stage two - insert eyes.  We used white marbles (the big ones) with colored flecks in them.  The white glowed beautifully when only slightly illuminated by a black light.  


Stage three - paper mache!  The first layers built the shape and gave foundation.  The top layer was a mushy mess, but gave great texture. 

Stage four - paint!  We used an airbrush and concocted this putrid green.  The airbrush allowed us to paint her without compromising the delicate nature of the paper mache.  

Stage five - dress and display!  We found this nasty old wig at a thrift store for $1.  Her clothes and hat were purchased specifically for her.  We wanted the hat to be positionable and it took awhile to find that hat!  Her shirt and skirt are classic witch attire from any costume retailer.


Friday, July 19, 2013

DIY: BBQ Bob

This glorious piece of terror came from the wellspring of my mind in conjunction with the internet musings of some other Halloween lovers.  He is lovingly called BBQ Bob and as our daughter tells us over and again, "that's disgusting!"  Well, thank you my dear.  Mission accomplished.  Now the how to:

BOB
1.  Start with a pre-fabricated skeleton.  We bought from www.skeleton-factory.com which buys 4th quality anatomical scale models and sells them to Halloween nuts.  We used a 3/4 size to save on weight as these guys are HEAVY.  

2.  You should be familiar with foam-o-fill, aka Great Stuff or expanding spray foam.  We used this to replicate the general appearance of intestines and guts.  Works wonderfully.  

Apply the foam to Bob while he is lying face up on a protected surface. The foam sticks to everything, including your skin, permanently.  

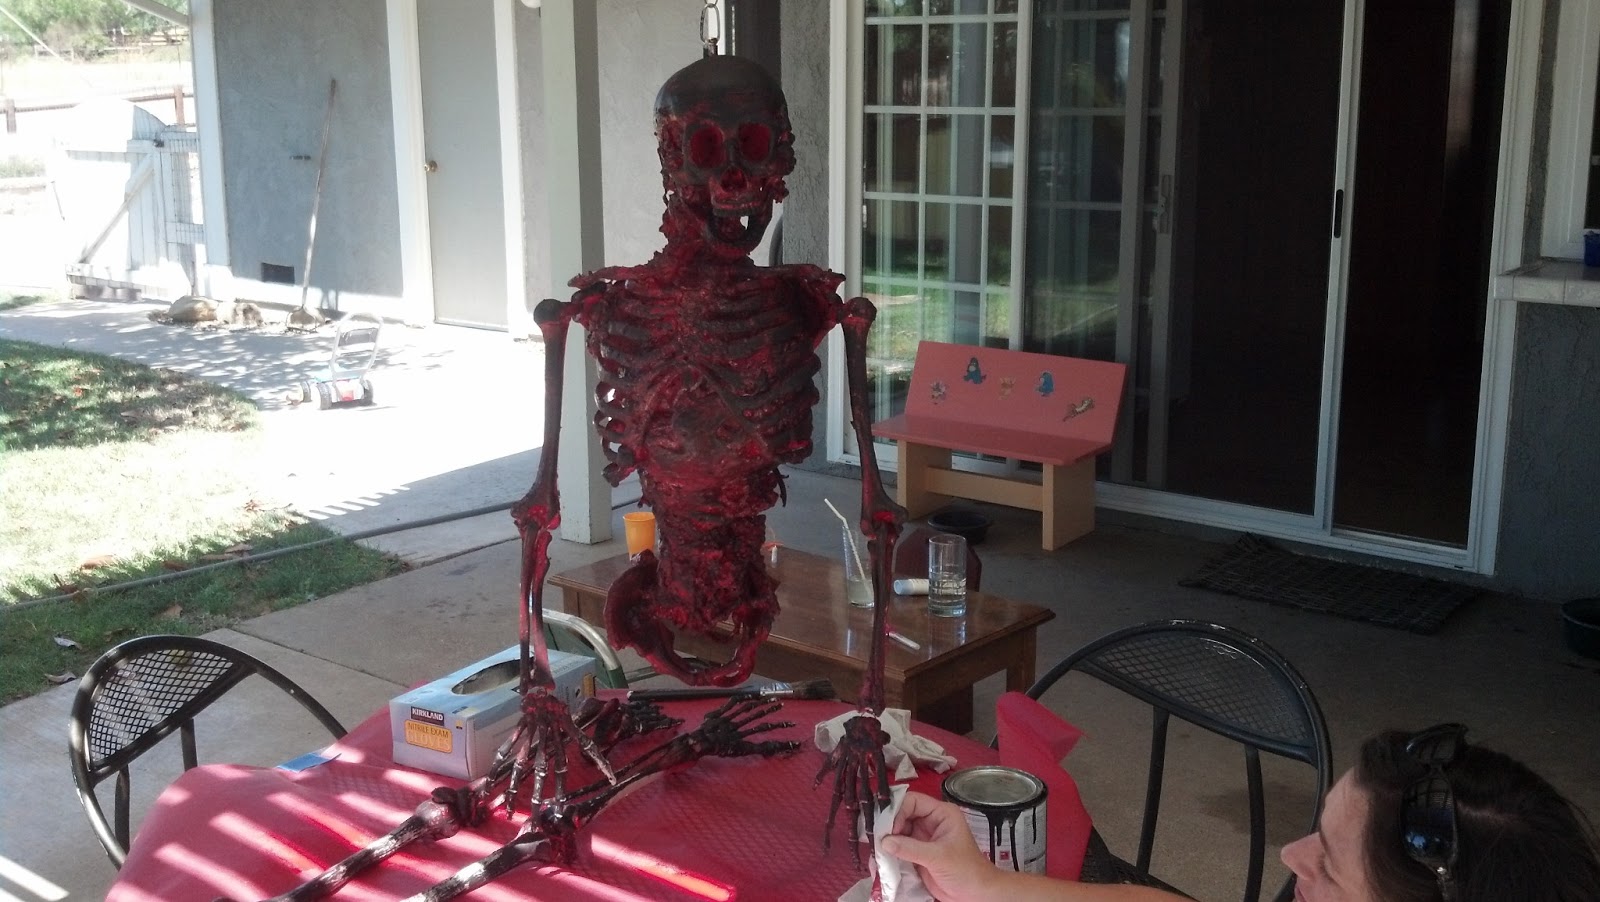
3.  We used red paint as a base coat and then dry brushed black over it give Bob that raw meat on the inside, toasted on the outside look.

4.  You'll need some plastic sheeting (available at any home improvement store) and make sure you do this OUTSIDE because it is toxic.  This is wrapped around Bob and melted with a heat gun to give the appearance of burnt skin.  You can even twist and layer so it looks like tendons and muscle.  

5.  The final stage involves using a really dark stain like walnut and staining the plastic.  It will dry, just give it time.  Dry brushing with black paint also works well.  

6.  We attached Bob to a spit and with a rotisserie motor got him to rotate.  His hands flop back and forth as he rotates!  Awesome!

7.  Finally, we put a light box under Bob so it looks like smoldering fire under him in the dark. Instructions on how to make a fire box in a later blog post.  

We hope you like him!  If you have any questions, just let us know.

Happy Haunting!


Thursday, July 18, 2013

The Website is Live!

Logo Tombstone Factory

Go to www.tombstonefactory.com to see our products and place your orders for Halloween!

Don't forget to Like our Facebook page - the first 500 Likes will receive a 10% discount on their future order.  Like away!

Haunter Finish                      Claibourne in Graveyard FInish

Friday, July 12, 2013

Sneek Peek on Facebook!

Check out our Facebook page, www.facebook.com/TombstoneFactory for a sneek peek of our product line!  

When we reach 500 Likes, we'll give everyone that Likes us a special discount.  Like away!

DIY: Pumpkin Guardians

We must start this post off with an all hail Pumpkin Rot at www.pumpkinrot.com. To see the inspiration for our work, go to Rotten Works and look for the Pumpkin Sentinels.  (If you haven't been to his site before, you're in for a treat, no tricks!)

So, several years ago we found Pumpkin Rot's Sentinels and thought we'd try our hand at it ourselves.  But where to start?  We didn't want to use real pumpkins because we wanted something to last.  Solution, a big beach ball we used as the frame and paper mache galore.  We covered the partially inflated beach ball (otherwise you don't get that squatty pumpkin shape) with plastic wrap so the paper mache wouldn't stick to the ball.  We used a LOT of layers to add strength.  A router with a cut off wheel attached made quick work of the eyes and grin, but be careful not to cut too far up or you'll loose stability.  


The body was framed with a piece of scrap wood for the spine and shoulder and baling wire for the ribs and arms.  Again, lots of paper mache.  We used an airbrush to paint.  

To mount, we use a 4x4 which has four pieces of flat steel screwed to each side and driven into the ground.  We have also used an umbrella stand.  The Guardian is attached with a metal bracket which is generally used to keep 4x4's from coming in contact with cement - it is inverted and the Guardian's just hook on the top of the 4x4.  We like this option so we can easily bring them in at night if there is fog or unruly kids nearby.  

A few glow sticks and your trick-or-treaters have to walk under 8 foot tall looming pumpkins to get their candy!  Magic!

Questions?  We're happy to answer all of them.